Your attic is probably not your favorite place to hang out. It's hot, it's cramped, and there's a decent chance you'll bang your head on a rafter within the first thirty seconds. But here's the thing: that dark, dusty space above your ceiling is actually one of the most important parts of your home when it comes to energy efficiency, comfort, and preventing expensive problems down the road.
The good news? You don't need to be a professional inspector to spot many common attic issues. With some basic knowledge, proper safety precautions, and about an hour of your time, you can perform a DIY attic inspection that'll tell you whether everything's okay or if it's time to call in the experts. Let's walk through exactly what you need to know.
Before You Climb Up: Essential Safety Precautions
Let's get the serious stuff out of the way first. Attics can be hazardous if you're not careful, and we don't want you ending up with an unplanned skylight in your ceiling (or worse, an emergency room visit). Here's how to stay safe:
Gear Up Like a Pro
- Safety glasses or goggles - Insulation fibers and dust will absolutely try to get in your eyes
- N95 dust mask or respirator - You don't want to breathe in fiberglass particles, dust, or potential mold spores
- Hard hat or thick cap - Trust us, you WILL forget about that beam. We all do.
- Long sleeves and pants - Insulation is itchy. Really, really itchy.
- Gloves - Protect your hands from splinters, insulation, and whatever else might be up there
- Sturdy shoes with good traction - No flip-flops, no matter how tempting
- Flashlight or headlamp - A headlamp is ideal since you'll want both hands free
The Golden Rules of Attic Safety
- ONLY walk on joists or place plywood across them - Step on the drywall/insulation and you'll go straight through your ceiling. Not if. When.
- Watch your head constantly - Seriously, those nails sticking through the roof sheathing are at the perfect height to cause problems
- Avoid extreme temperatures - North Carolina attics can hit 130°F+ in summer. That's legitimately dangerous. Do your inspection on a cooler day, preferably spring or fall.
- Tell someone you're going up there - In case something goes wrong, someone should know where you are
- If you feel uncomfortable or unsafe, stop - There's zero shame in calling a professional. That's literally what we're here for.
When NOT to DIY
Skip the DIY inspection and call a professional right away if you notice:
- Sagging or damaged roof structure visible from below
- Active water leaks or major moisture problems
- Evidence of extensive pest infestation
- Suspicious materials that might be asbestos (common in homes built before 1980)
- You have mobility issues or concerns about navigating tight spaces
Your DIY Attic Inspection Checklist
Alright, you're geared up and ready. Here's exactly what to look for, in order of importance:
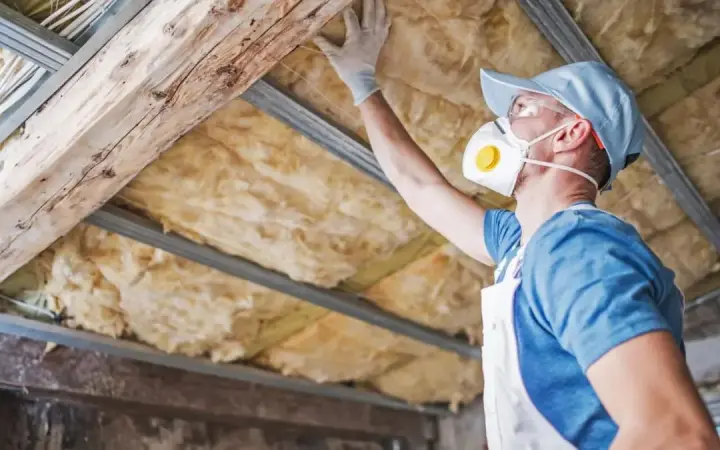
1. Insulation: The Main Event
This is probably why you're up there in the first place. Here's what to check:
Depth and Coverage
- Measure the depth of your insulation with a ruler or tape measure
- For Greensboro, you want at least 12-16 inches of blown insulation or equivalent (R-38 to R-49)
- If you can easily see the tops of your ceiling joists, you definitely need more
- Look for gaps or thin spots, especially around the perimeter and near eaves
- Check corners and hard-to-reach areas—these are often under-insulated
Condition
- Is the insulation compressed, matted down, or damaged? Compressed insulation loses effectiveness
- Is it discolored, stained, or wet? This indicates water damage or air leakage
- Any signs of animal disturbance or nesting?
- Old insulation that's settled significantly may need to be supplemented
Pro tip: If your insulation looks inadequate or damaged, schedule a free inspection with us to get professional measurements and recommendations specific to your home.
2. Moisture and Leaks: The Silent Home-Killers
Water is your home's enemy, and attics are where water problems show up first. Look for:
Water Stains
- Dark spots or discoloration on roof sheathing or rafters
- Stains around chimneys, vents, skylights, and other roof penetrations
- Rust or corrosion on metal components (nails, brackets, etc.)
Active Leaks
- This is why inspecting during or after rain is actually helpful
- Look for dripping, damp spots, or standing water
- Wet or moldy insulation is a red flag
Mold and Mildew
- Black, green, or white fuzzy growth on wood surfaces
- Musty odors (your nose knows!)
- In North Carolina's humid climate, mold can develop quickly with any moisture issue
Important: If you find significant mold growth (more than a few small spots), don't disturb it. Back out carefully and call a professional. Mold remediation is not a DIY job.
3. Ventilation: The Unsung Hero
Proper attic ventilation is crucial in North Carolina's climate. Without it, you get condensation, mold, and a roasting-hot attic that makes your AC work overtime.
Check for:
- Soffit vents - Look at the underside of your roof overhang from outside. You should see vents allowing air to enter
- Ridge vents or roof vents - Check the peak of your roof for continuous ridge vents or individual roof vents
- Gable vents - Vents in the gable ends of the attic
- Attic fans - If present, are they working? (Be careful around electrical components)
Red Flags:
- Vents blocked by insulation (super common and surprisingly problematic)
- No visible air movement or circulation
- Excessive humidity or condensation on surfaces
- Rusty nails protruding through roof sheathing (indicates condensation issues)
Fun fact: Blocked soffit vents are one of the most common problems we find during inspections, and they're often caused by well-meaning but improperly installed insulation. Our team knows how to add proper attic insulation while maintaining critical ventilation pathways.
4. Structural Components: The Bones of Your Home
You don't need to be a structural engineer, but you should look for obvious problems:
- Sagging or bowing rafters - Roof framing should be straight, not curved
- Cracks in wood members - Small cracks are often normal, but large splits or multiple cracks warrant attention
- Signs of rot - Soft, crumbly, or discolored wood (usually from water damage)
- Improperly cut or modified trusses - Someone may have cut into structural members for storage or access (big no-no)
- Adequate roof support - Are there enough rafters/trusses, or does spacing seem too wide?
If you see anything that looks structurally questionable, take photos and consult with a professional immediately. This isn't something to gamble on.
5. Pests: The Unwelcome Roommates
Your attic might be home to more than just your holiday decorations. Look for:
- Droppings - Small pellets usually indicate rodents; larger droppings suggest raccoons or larger animals
- Nests - Birds, squirrels, and rodents love a good attic nesting spot
- Chewed materials - Gnawed wood, wiring, or insulation
- Grease marks - Rodents leave dark, oily trails along their regular paths
- Entry points - Gaps in soffits, vents without screens, or holes in the roof structure
- Sounds or smells - Scratching noises or foul odors are dead giveaways
If you have a pest problem, deal with it before adding new insulation. Otherwise, you're just giving them a cozier home. We can recommend trusted pest control professionals in the Greensboro area.
6. Electrical and Mechanical: Potential Fire Hazards
Look, we're not electricians, but you should keep an eye out for obvious problems:
- Exposed or damaged wiring - Frayed insulation on wires is a fire risk
- Junction boxes without covers - Electrical connections should be enclosed
- Recessed lights - Are they IC-rated (insulation contact)? If not, insulation should be kept away from them
- Improperly installed fixtures - Any electrical work that looks sketchy probably is
- Overheating components - Discoloration or burn marks around electrical fixtures
If you spot electrical issues, don't touch anything—just note it and call a licensed electrician.
7. Air Leaks: The Energy-Bill Culprits
Even with great insulation, air leaks can devastate your home's efficiency. Common trouble spots:
- Around the attic hatch or door - Is it properly sealed and insulated?
- Recessed lighting fixtures - Major air leak points
- Plumbing stacks and vents - Gaps around pipes penetrating the ceiling
- Chimney chase - Where the chimney goes through the attic floor
- Wire penetrations - Anywhere wires pass through the ceiling
- HVAC equipment - Gaps around ducts or units in the attic
Pro tip: On a windy day, you might feel air movement around these areas. Or use a smoke pencil (but please be careful with fire in your insulation-filled attic).
What to Do After Your Inspection
Congratulations! You've completed your DIY attic inspection. Now what?
If Everything Looks Good:
- Great news! Schedule another inspection in 6-12 months to keep tabs on things
- Consider having a professional inspection every few years for a more thorough assessment
- Keep an eye on your energy bills—sudden increases can indicate new problems
If You Found Minor Issues:
- Document with photos and measurements
- Research solutions for simple fixes (like clearing blocked vents)
- For insulation upgrades, get quotes from professionals (hint: we'd love to help)
- Prioritize based on severity and impact
If You Found Major Problems:
- Don't panic, but don't ignore it either
- Call professionals immediately for: structural issues, major leaks, extensive mold, or electrical problems
- Get multiple opinions if the issue seems serious
- Ask about warranties and guarantees on any work performed
When to Call 4 Seasons Insulation
We believe in empowering homeowners with knowledge—that's why we're giving you this inspection guide for free. But there are definitely times when professional help is the smart move:
- You need more insulation - We install Climate Pro blown insulation (formaldehyde-free!) to the exact R-value your home needs
- You want radiant barriers - In North Carolina's hot summers, radiant barriers can dramatically reduce attic heat
- You found issues you're not comfortable addressing - No judgment—attics aren't everyone's favorite place
- You want an expert opinion - We offer free, no-pressure inspections with detailed recommendations
- You're buying or selling a home - Professional documentation can be valuable during real estate transactions
Unlike some companies, we don't believe in scare tactics or unnecessary upsells. We'll tell you honestly what you need, what you don't need, and what can wait. We've been serving Greensboro homeowners for years because we treat every home like it's our own.
The Bottom Line
A DIY attic inspection isn't glamorous work, but it's one of the smartest things you can do as a homeowner. An hour of crawling around in your attic can save you thousands in energy costs and prevent major problems before they start.
That said, know your limits. If you discover issues beyond your comfort level, or if you just want professional peace of mind, that's exactly what we're here for. We'll come to your home, perform a thorough inspection, explain what we find in plain English (no industry jargon unless you want it), and give you honest recommendations.
Ready to tackle your attic inspection, or would you rather have professionals handle it? Either way, we're here to help. Contact us today to schedule your free attic inspection, or just to ask questions—we're always happy to help a homeowner make informed decisions about their home.
Stay safe up there, and remember: if in doubt, give us a shout. We've seen thousands of attics in the Greensboro area, and yours will be nothing we haven't handled before.